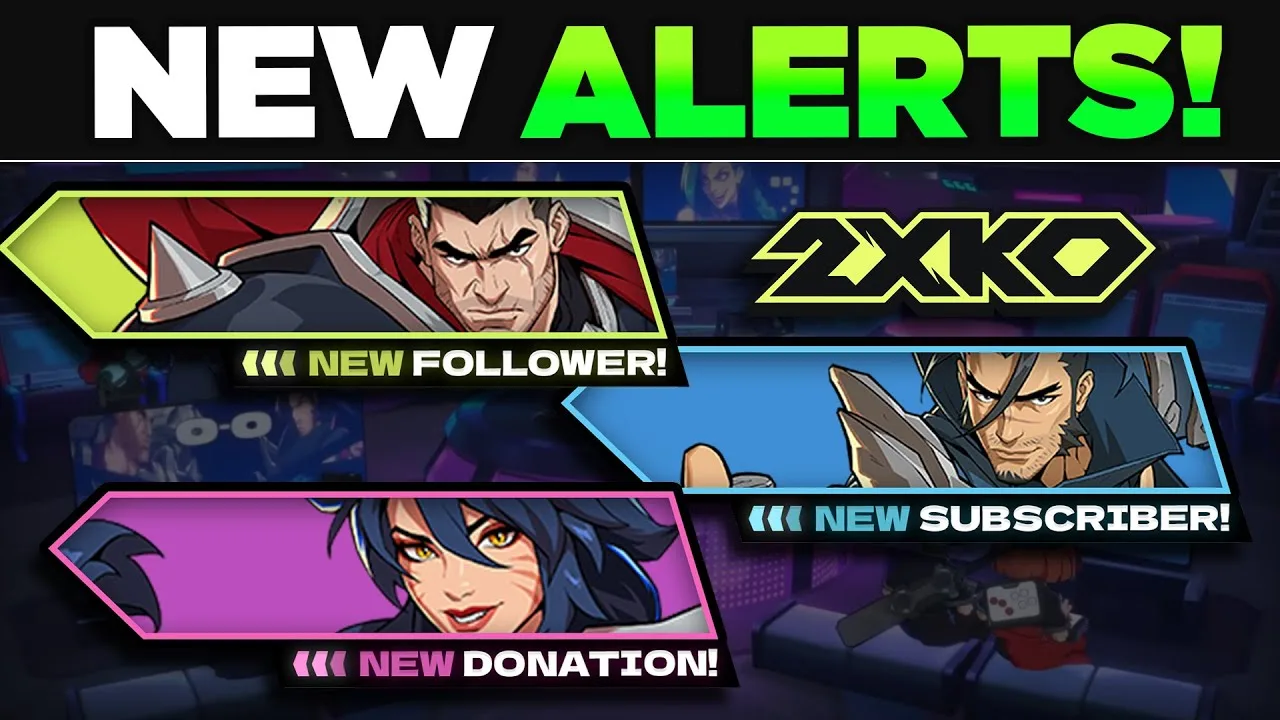
Animated stream alerts are the fastest visual upgrade you can make to a fighting game stream. A follow, a sub or a tip stops being a line of text in the corner and becomes a character slamming onto the screen with a voice line behind it.
The catch is that nobody tells you what to do with the files after you buy them. You get a folder of .webm and .mov files and a blinking cursor. This guide is the whole process end to end — getting the alert into StreamElements, styling the text, attaching the voice line, fixing the timing, and getting it into OBS as a browser source.
Budget about ten minutes for your first alert and roughly two minutes for every one after that.
What you actually need before you start
- The alert files. Transparent animated files —
.webm,.movand.png— plus the voice lines that go with them. The 2XKO animated alerts pack ships five alerts with custom voice lines already cut for each one. - A StreamElements account. Free. This is what listens for the follow or sub and fires the animation.
- OBS, Streamlabs or Meld. Anything that accepts a browser source works. This guide shows OBS, but the steps are identical elsewhere.
That’s it. There’s no plugin to install and nothing to pay for beyond the alert pack itself.
StreamElements or Streamer.bot? Pick before you build
Both work with the same files. They are aimed at different people, and picking the wrong one is the single biggest time sink in this whole process.
| StreamElements | Streamer.bot | |
|---|---|---|
| Setup time | ~10 minutes | An afternoon |
| Runs in | Your browser | An app on your PC |
| Multi-platform | Rebuild the alert per platform | Build once, fires everywhere |
| Custom logic | Limited | Anything you can wire up |
| Best for | Getting it working today | Multistreaming and long-term setups |
If you only stream to one platform, StreamElements is the correct answer and the rest of this guide is for you. If you’re already multistreaming to Twitch, YouTube and Kick, skip ahead to the Streamer.bot section — you’ll save yourself building the same alert three separate times.
Step 1: Connect your platforms
Sign in to StreamElements and connect every platform you stream to — Twitch, YouTube, Kick, Trovo. The one you’re currently signed in as is your active channel, and this matters more than it looks: alerts are built per channel. An alert you build on your Twitch channel does not exist on your Kick channel.
Pick your main platform first and get one alert working there before you duplicate the work elsewhere.
Worth knowing early: the available events differ by platform. Twitch exposes the most triggers. Kick exposes noticeably fewer. If an event you want isn’t in the list, that’s a platform limitation, not something you’ve done wrong.
Step 2: Create the element
In the left sidebar go to Streaming Tools → Elements → New Element → Start from scratch.
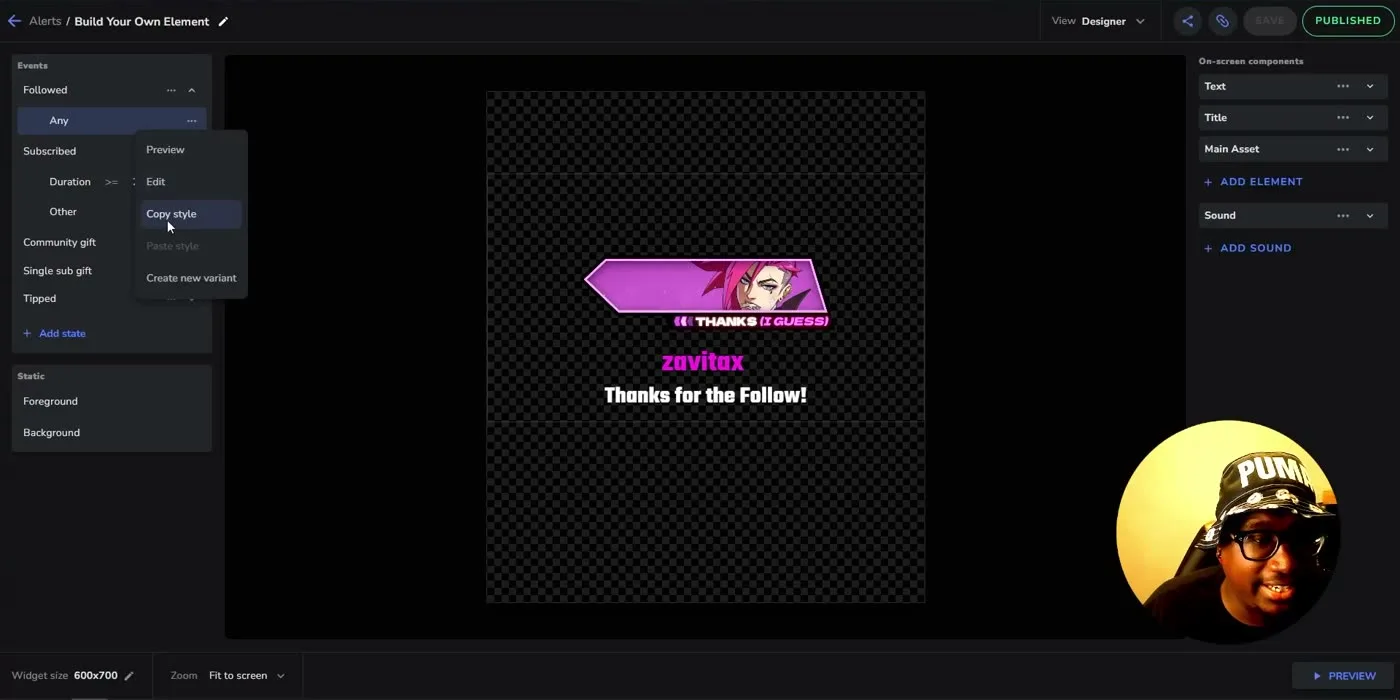
You land in the element editor, and the layout is worth a second to understand because everything else depends on it:
- Left panel — Events. Followed, Subscribed, Community gift, Single sub gift, Tipped. Each one gets its own artwork, text and sound.
- Middle — the canvas. A live preview of the alert.
- Right panel — On-screen components. Text, Title, Main Asset, and Sound. This is where you build.
Start with Followed → Any. Follows are the easiest to test because you don’t need somebody to spend money to fire one.
Step 3: Add the animation
On the right, click Main Asset → Replace asset. You’ll get two tabs: By StreamElements (their stock library) and My uploads (yours). Go to My uploads, hit Upload new, and pick your alert file — or just drag it straight onto the window.
Select the file and hit Save. It drops onto the canvas already animating.
Now drag it where you want it and resize with the corner handles. Centred is a safe default. Whatever you choose, keep it consistent across all your alerts — viewers learn where to look, and moving the target between alert types just makes your stream feel unfinished.
Step 4: Set the title and the text
There are two separate text layers and they do different jobs:
- Title — this is the variable that pulls in the viewer’s username. Leave the variable alone. If you type over it you’ll hardcode one person’s name into every alert you ever fire.
- Text — your message. “Thanks for the follow!”, “Welcome to the squad”, whatever fits your channel.
Keep the text short. It shares the screen with an animation and it’s on screen for a few seconds. One line beats two.
Step 5: Style it so it looks like yours
This is where a bought alert stops looking bought. Select the layer you want to change first — styling the Title and styling the Text are separate operations, and applying settings to one and expecting the other to follow is the most common mistake here.
- Font. A condensed bold face reads well at speed. Around size 40 with weight set to bold is a solid starting point.
- Colour. Pull a colour out of the artwork itself rather than picking one you like. If the alert is pink, make the username pink. That one choice is what makes the pack look like it was made for your channel.
- Stroke. Leave it at zero. An outline sounds like it will help legibility and in practice it fattens the letters and makes everything look cheap. Even a width of 1 is usually too much on text this size.
- Shadow. A drop shadow of about 1px on each side lifts the text off busy gameplay without the stroke problem. Select the whole text layer before applying it.
Go slightly darker than you think on the colour, then check it against actual gameplay. Bright pink on a bright stage disappears.
Step 6: Add the voice line
Under Sound → Add sound, go to My uploads → Upload new and add the audio that came with your pack, or your own clip. Select it and save.
You can set the volume here, and you should — alert audio that’s louder than your game is the fastest way to make people mute you.
One thing StreamElements can’t fix: if the clip has silence at the front, the voice line lands late and there’s no delay setting to compensate. Trim the dead air off the front of the file in any audio editor and re-upload. It’s a thirty-second fix and it’s the difference between the alert feeling snappy and feeling broken.
Step 7: Fix the timing — the step everyone skips
Hit Preview in the bottom right and watch it properly. What you’ll almost always see the first time is the text vanishing while the animation is still playing, which looks like a bug even though nothing is broken.
The fix is the fade-out duration. The default sits around 4 seconds, which is shorter than most animated alerts. Push it out — roughly 6 seconds is a good match for a typical alert — and change it on the Title and the Text, not just one of them. If only one moves, the username and the message disappear at different moments, which looks worse than the original problem.
Preview again. Everything should now leave the screen together. Then hit Save, then Publish — saving alone does not push it live.
Step 8: Get it into OBS
Publishing gives you a URL and a set of dimensions. Copy the URL, then in OBS:
- Select a scene, or create a new one
- In Sources, click + → Browser
- Name it something you’ll recognise later — “2XKO Alerts (Twitch)” beats “Browser 4”
- Delete the default URL and paste yours in
- Set Width and Height to match the widget size StreamElements shows you — in this build that’s 600 × 700
- Leave everything else alone and click OK
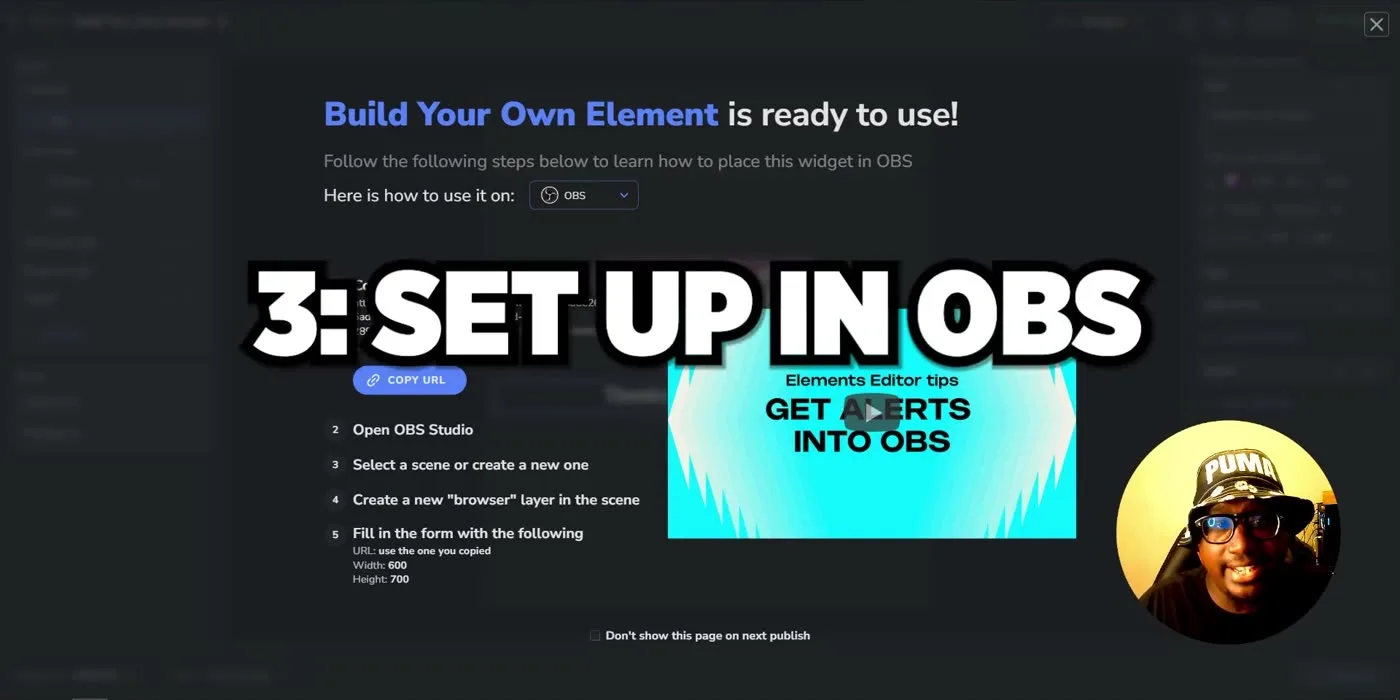
It will look like nothing happened. You’ll get an empty box in your scene. That’s correct — the alert is transparent until something triggers it. Fire a test from StreamElements and it’ll appear.
Position the empty box now, while you can see its outline. Chasing it around mid-stream while an alert is playing is miserable.
Step 9: Build the rest without redoing the work
You now have one alert. You need four or five. StreamElements has no duplicate button for elements, but it does have Copy style and Paste style in the “…” menu next to each event.
So for each remaining event: copy the style from your finished alert, paste it onto the new one, then swap the Main Asset, swap the sound, and change the text.
The trap: Copy style does not carry your fade-out duration across. Every alert you paste onto will come back with the default 4-second fade and the text will pop out early again. Reset it on every single one, and preview every single one before you move on. Assume the copy worked and you’ll find out live.
While you’re here, write different text per event. “Thanks for the follow” and “thanks for the sub” should not say the same thing — a sub is worth more of a reaction than a follow.
Setting up the YouTube subscriber alert
The YouTube version follows the same steps, with two differences worth calling out.
The event you want is Subscribed → Any. And YouTube exposes a subscriber count variable, so you can put your running total in the alert text — something along the lines of “Subbed to the YouTube Channel! (NEW Sub Count: [Total Subscribers])”.
Be aware that the count StreamElements reports can lag behind your real subscriber number. If accuracy matters to you more than the effect, leave the count out.
The upgrade path: Streamer.bot
Everything above is per platform. Stream to three places and you build every alert three times, and every time you tweak the wording you tweak it three times.
Streamer.bot solves that by working in Actions instead of elements. An action is a list of things to do; a trigger is what starts it. One action can be wired to the same event on Twitch, YouTube, Trovo and Kick simultaneously — including shared chat, so a multistream event still fires correctly.
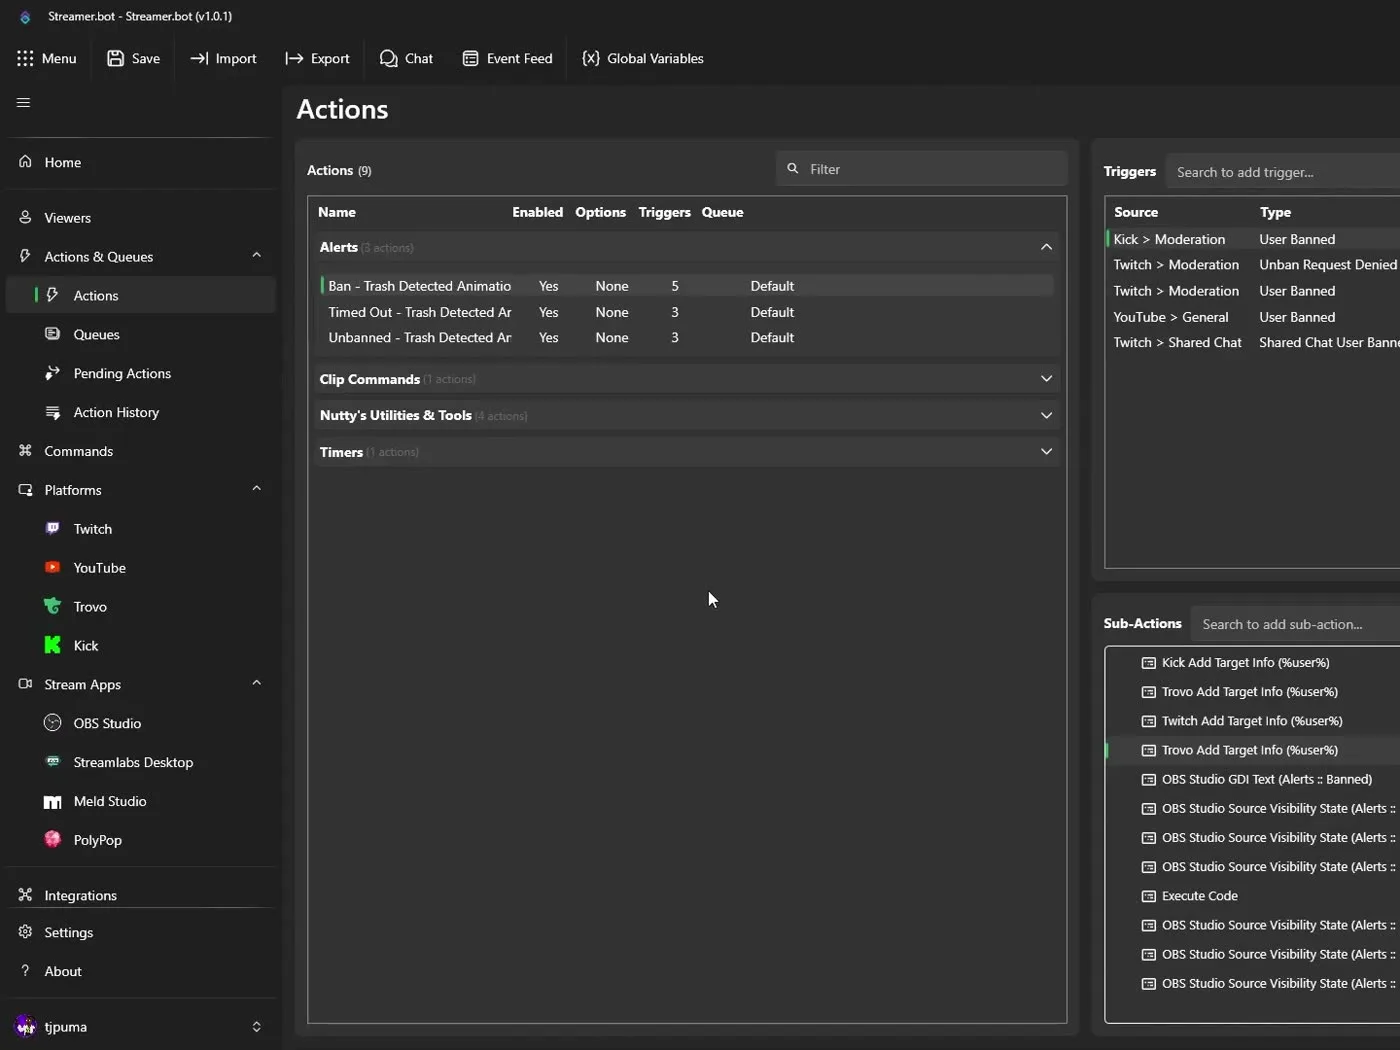
A typical alert action does four things in order: read the user data from whichever platform fired it, write that name into a text source in OBS, show the animation, then hide it again. Because you control each step, you can trigger on things StreamElements simply doesn’t expose.
The honest trade-off: it is genuinely more work up front, and it’s an app you have to remember to run. If you’re on one platform, it isn’t worth it yet. If you’re on three, you’ll make the time back inside a month.
When it doesn’t work
| Symptom | Cause |
|---|---|
| Nothing appears in OBS, ever | You saved but didn’t publish, or the browser source URL is wrong |
| Animation plays, no sound | Browser source is muted in OBS’s Audio Mixer, or no sound was attached |
| Text disappears early | Fade-out still at the default — fix on Title and Text |
| Voice line lands late | Silence at the start of the audio file. Trim and re-upload |
| Alert is cut off at the edges | Browser source dimensions don’t match the widget size |
| Works on one platform only | Alerts are per channel. Rebuild it, or move to Streamer.bot |
| Someone’s name overwrites every alert | You typed over the Title variable |
The short version
- Connect your platforms in StreamElements and pick your main channel
- Streaming Tools → Elements → New Element → Start from scratch
- Followed → Any, then Main Asset → Replace asset → upload your file
- Leave the Title variable alone, write your own Text
- Style Title and Text separately. No stroke, small shadow, colour pulled from the art
- Add the sound and set the volume
- Push the fade-out to around 6 seconds on both text layers, then preview
- Save, then Publish
- Copy the URL into an OBS browser source at the size StreamElements gives you
- Copy style onto your other events — and redo the fade timing every time
Get the alerts
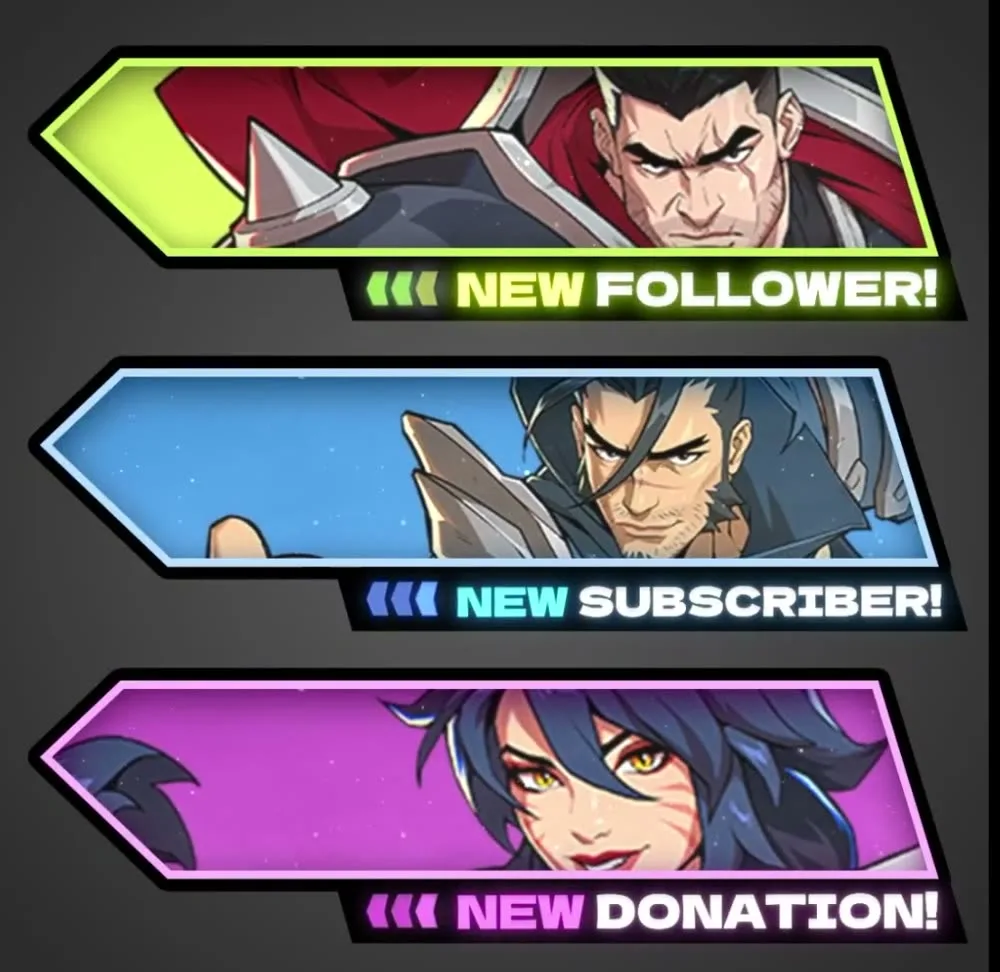
The 2XKO Animated Streamer Alerts pack is five animated alerts themed around Thresh and Senna, delivered as MOV, WEBM and PNG with a custom voice line for each one. It works with everything in this guide — OBS, Streamlabs, StreamElements and Streamer.bot — and it’s an instant download.
Running a tournament or a scoreboard scene as well? The fighting game scoreboard overlay covers the other half of a competitive stream layout, and the rest is in the shop.
If you get stuck on a step, the 2XKO Jungle Discord is the fastest place to get it sorted — plenty of people there have already been through this setup. And if you’d rather spend your time on the game than the layout, the Season 2 tier list and the current meta breakdown are waiting.